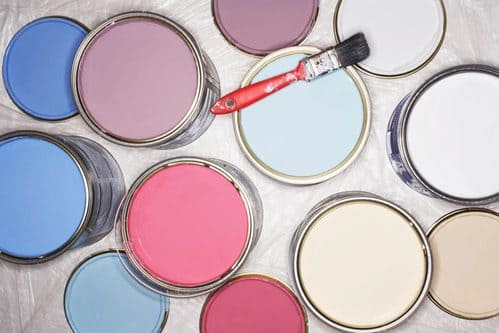
If you are planning a house painting project and tackling it on your own you may be wondering how to get started and what you will need to get it done.
With painting tips from professional painters we feel certain you will achieve the best house painting results.
Painting Tools Used by Painters
Get a notepad and pencil ready to create your shopping list of tools you will need. By having the appropriate tools like the right paint brush and paint roller you’re already on your way to that perfect finished look.
Here is all that you will need for supplies, materials and tools to get started on your DIY painting checklist.
Painters Tape – its uses are endless for beginners and DIYers Use it as a guide and as protection around the glass on windows. Taping around the edge of the glass will ensure no paint is dripped onto the glass, taking more effort to have to scrape off the paint once it has dried.
Place the painters tape on the edges of the baseboards, trim and around door frames. It can also be used to tape off door handles, electrical outlets and light switch plates. It is even easier to completely remove the light switch plates, electric outlet covers and door handles or cover the door knobs with a small plastic bag and tie it up with an elastic band. This will allow you to paint without the worry of painting over any of them.
Painters tape can be the perfect ruler for painting a straight line. Once you have placed the green painters tape where you do not want to get any paint on, you can paint as close to the edge as needed without the worry of it bleeding over into the other colour or onto another surface. Just remember to peel it off on an angle and soon after the painting is done. If the paint is partially dry it would be best to wait until the following day to avoid any having any of the fresh paint peel away with the tape.
Plastic Tarp Covering – Protect everything you do not want to be painted. Buy a roll of plastic sheeting to cover floors, carpets, and furniture. By placing all the furniture into the middle of the room it is easier to cover everything at one time. It can also be easier to completely empty the room you will be painting.
Making sure you take the time to lay down drop cloths is a secure way to make sure there are no regrets after starting a painting project. Don’t forget to put drop cloths on your to buy list.
Paint Brush, Paint Rollers and Putty Knife – Don’t get caught with hairs or fibers left behind on the walls, ceilings, doors or trim by using cheaper brushes and rollers. Spending a little extra on better quality tools will avoid running into paint problems like bubbling or blistering paint, streaks and dripping look of paint on walls.
Buy a putty knife to fill in nail pops, patch dents, holes or imperfections in the drywall. If there is more damage to the drywall than just nail pops or small holes then you need to get a trowel and drywall compound to do drywall repairs.
Caulking Tube buy caulking tube and applicator to seal any cracks around the windows, trim and baseboards are filled before you begin painting. Caulking before painting is an important first step to achieving good end results.
Sandpaper and Sanding Block purchasing sandpaper and a sanding block will help to smooth out imperfections on the walls or ceilings along with on the trim and baseboards. After filling nail pops with filler or patching the drywall with compound, you should always smooth out the surface area with sandpaper. If the area is small like the nail pops the sanding block will be fine to use. If the area is larger like a bigger hole or dent in the wall then sandpaper should be used for the bigger area.
If the budget allows it, splurging on the better quality paint product will be worth it, because not all paints are created equal. you will want to buy a middle to top range line of paint product to ensure the smoothest finish and the easiest of applications. The cost of paint varies by only a few dollars between the different brands.
Taking the necessary steps in getting things ready before any painting is started helps to avoid paint blocking or sticking or paint peeling problems. Taking the extra time to prep walls first will avoid the headaches later.
Pro Painters Tips and Advice
Painting is one of the most common do-it-yourself projects homeowners take on. It does help to know the tricks of the trade to get the best results so you can achieve the professional results.
After you have purchased all of the supplies, tools and paint needed to get started you will want to make sure you take the necessary steps to prepare the drywall for painting by ensuring the imperfections have been properly taken care of by patching or repairing the areas first. Sanding all the trim, baseboards and drywall repairs using a sponge sanding block or sheet of sandpaper ensures smooth surfaces before painting.
Tip Using a good quality primer first will ensure that the surface is properly sealed and the new paint adheres better.
Painting with a paint primer will cover the old paint and help prevent it from bleeding through or showing up underneath the newly painted surface.
Don’t cut corners when it comes to quality paint and primer products as there really is a difference between the paint, the primer and the all in one paints.
Advice Follow these tips on how to prepare a room for painting to ensure you are not cutting any corners.
If you have stains caused by water damage or smoke stains using the Kilz Original spray can is ideal for small spot coverage like the ceiling or wood grains of trim or baseboards.
Using a good paint brush and paint roller will avoid leaving behind missed spots, drips of paint.
Tip Paint from top to bottom starting with the ceilings, then the walls and finally paint the trim and baseboards.
Advice If you are doing it yourself and do not have the professional skills to trust yourself to not get any paint from the walls onto the baseboards or trim we recommend you to start with painting the trim and baseboards first, followed by the ceilings and finally the walls.
This allows you to tape off the trim and baseboards so that the wall colour does not bleed over onto the trim or baseboards. It will be easier and faster to just tape off the trim and baseboards then to have to tape off all the walls and ceilings too.
Wait at minimum 24 hours after painting the trim and baseboards to apply the painters tape. After taping has been done, move on to painting the ceilings then move down to the walls.
Tip – Use an angled brush to cut in the edges at the ceiling, baseboards and trim, and a paint roller to apply the first coat of paint starting from the ceiling and rolling downwards.
Advice Let the painted area dry completely before painting the second coat. If you go back and forth over it while still wet you will end up with streaks or marks.
Tip – If you have left over paint store it so that if necessary you can do some touch ups or repaint later.
Advice – Hiring a the right painting contractor will help alleviate the intense labour and is the right investment for maintaining your home.
If you question the reasons why you should paint or how often you need to paint knowing that these should be every homeowners good maintenance practice goals to ensuring the best curb appeal and interior upkeep.
It is also a well known fact the painting and maintaining your home guarantees you the best return on your investment (ROI) if you are planning to sell it.
Hire A Professional Painting Company
Let’s just go through that shopping list one more time as it is lengthy and can become expensive, especially if you never make use of all those tools and materials again. Here’s a list you can copy or print to take with you when shopping for everything you’ll need for your project.
Shopping List For Tools and Supplies Needed For Painting
- Painters Tape
- Plastic tarp
- Drop cloths (thick heavy canvas ones) for floors and carpets
- Paint brushes
- Paint roller
- Painting pan
- Paint can opener
- Putty knife
- Small container of pre-mixed drywall compound to cover any holes, dents and drywall imperfections
- Sand paper & sanding block
- caulk and caulking gun
- Extension pole to use for the paint roller and sand paper
- Good quality paint
- Ladder you may need to buy one or two a short 2 or three steps and a longer one to be able to reach the ceilings and corners safely
If all of this sounds like too much, then it would be highly recommended to call on the professionals.
The best painters can alleviate the expenses, the hassle and the worry of doing it all yourself.
Hiring a qualified painter to provide a painting estimate with a quote that includes all the tools, materials, supplies and paint along with all the strenous labour will prevent the stress, headache and intense labour you will have to endure.
The question is will it be as affordable as first thought if you are left with all these tools and equipment to keep. Will you ever use them again or do you even have the storage space for them all. Working with the right painting contractor is an affordable and easy way to give your home a makeover.
If you want to rid yourself of the stress and worry of buying all the equipment, tools and supplies needed to paint like a professional, simply hire a professional house painter in Ottawa.
We’re here to help if you need us with a call or drop us an email.
This post was originally published on March 3, 2017 and edited on May 20,2021
